
Painting a bedroom is a familiar task for most do-it-yourselfers. With at least effort, you can get a fantastic result. However, painting the bathroom is somewhat not the same as painting different areas of the home. Washrooms are little and loaded with water from various sources, and they get heaps of hefty use. Delightful outcomes must give special consideration to all parts of washroom painting, from surface arrangement and color choices to the way toward painting and last touches.
We’re back with another set of painting tips! Our master tips and tricks to painting like a genius post will help you paint practically any room; however, let’s face it; the washroom is a special room. It’s little; it gets utilized *ahem* a great deal, and the entire shower angle implies this small room has more dampness than some other room in the house!
This implies you’ll have the best outcomes on the off chance that you set aside the effort to paint your bathroom walls with the correct items for the work. Water spots? Mold? Crackling paint? With the right products, you won’t have any of these issues. Simply smooth, delightful, painted walls!
Are you prepared to begin? Here are my best 8 Tips for painting a little bathroom, a fast and simple way!
1. Choose the Best Paint for the Bathroom
Washrooms are wet places, and water will, in the long run, jump on your paint, regardless of how enthusiastically you attempt to maintain a strategic distance from this. Some paint makers sell what they call restroom paint: a paint that has both form restraining agents and a superior surface for opposing moisture.
Whether you would prefer not to purchase extraordinary washroom paint, you might need to spend somewhat more for a quality brand of paint. A portion of the less expensive paints have a similar cosmetics shade as the more costly paints; however, they have fewer solids. Solids are the parts that dry to shape the defensive acrylic-latex layer on your wall. Regularly, it pays to purchase better (and frequently more costly) paints since they have more solids and, in this manner, more superior strength.
Whenever you see shower tile, notice that the outside of the tile is polished. More shiny sheens will, in general, make a superior showing of repulsing dampness and trash than do compliment sheens.
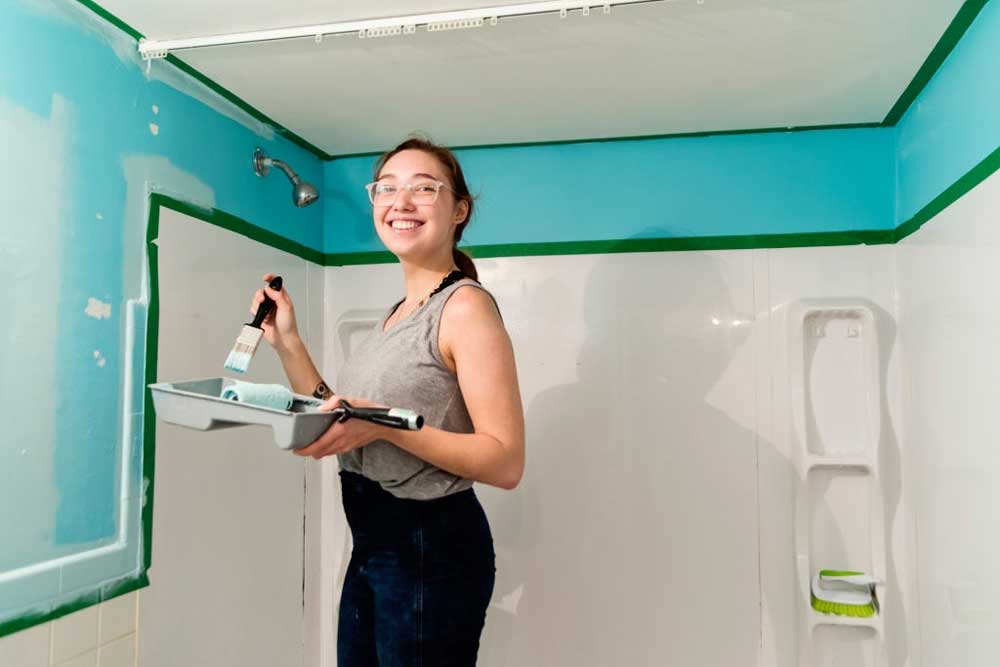
2. Vibrant Teal
A brilliant shade of greenish-blue makes an incredible articulation in this advanced washroom design. Picking a distinctive tone for the walls and roof truly makes the metro tile backsplash, fine art, and fixtures pop.
3. Prep Your Walls
To let you through each part of this task, I’m handling my very own undertaking the little washroom in my Mama’s home. This room has no window, and the paint has been here since before she purchased the house; the paint itself is breaking and developing mold in the corners, so we’ll need to handle the entirety of that before we begin.
Since her walls are rotten, I began by giving each wall a decent clean with a touch of water and blanch. The real antiquated effort is unquestionably your best device against form, so don’t be reluctant to scour truly. When your walls are spotless, ensure you fill in any openings, so you have a smooth surface to paint. Fill in the gap with spackle and afterward let the blend dry before sanding it smooth.
4. Move Your Toilet and Other Things in the Bathroom
You’ll improve paintwork on the off chance that you briefly eliminate the toilet tank instead of attempt to paint around it. If you move the toilet tank, remove all other removable things from the room, for example, cleanser bottles, towels, and so forth, and spread the mirrors. Ensure your painters applied any small itemizing you don’t need to be covered up with painters’ tape.
5. Remove the Toilet Tank
It is tough to paint around toilet tanks and work admirably of it. In particular, the issue is the little break between the tank and the wall. The space is so tiny; you need to quickly apply painter’s covering film and painter’s tape around the tank; at that point, wipe the brush consistently to get a strong tone. Rather than working around the block, the best move is to eliminate the obstruction.
Eliminating the toilet tank and other steel storage structures may sound messy and troublesome; however, it isn’t. Toilets ordinarily come in two areas: the top tank and the bowl, or base. The chaotic segment is the base, and that segment won’t be eliminated. Turn off the water gracefully at the shutoff valve on the wall, flush the toilet to oust all water, at that point, eliminate the tank with a few old towels on the floor to get spills.
6. Color the Ceiling the Same Color As the Wall
One of the most significant considerations regarding painting your washroom is ensuring the space feels large and open and not very thick and swarmed after your finished painting. Having a uniform tone from wall to roof gives the impression of more breeziness and greater space. Once more, you don’t need a flat roof in the bathroom, as it might cause the room to feel more limited. To cause it to feel considerably taller, you can have a go at painting the walls with vertical stripes. If you need a more extensive feel, try horizontal lines.
7. Cover Areas That Will Not Be Painted
Tape off the roof, trim, bath encompasses backsplash and different regions that won’t be painted. Wrap drop fabrics over the bathroom vanity, sink, mirror, and over the ground surface.
8. Paint with the Roller
Fit the roller spread on the roller frame. Open the paint can and empty paint into the base repository of the paint plate. Liberally dunk the roller spread in color; at that point, completely turn it out on the paint tray’s upper zone.
Paint a square space around two by two feet, utilizing calculated strokes that generally make a “W” on the wall; at that point, fill in the W’s clear areas with a progression of generally equal passes of the roller. Move to an adjacent space, ensuring that you work from the wet edge of the preceding section.